
Chives are a delicious and versatile herb that everyone should have on hand in the kitchen. Simply sprinkle them on top of almost any savory meal or store them in a variety of ways. Check out these five easy ways to use and store your chives so you can enjoy your harvest year-round.

The key to having the freshest, most flavorful chives is to grow them yourself. No experience is needed to learn how to grow chives – they’re the easiest plants to grow!

1. Fresh Chives
Of course, using chives fresh is the best way to add flavor and color to your food. Don’t overlook this humble herb! Adding freshly chopped chives to almost any savory dish instantly makes you feel like a 5-star chef. *chef’s kiss*

Add freshly chopped chives on top of meats or fish, chili or soup, and eggs or potatoes made a million ways. Add them to salads, dips, and vinaigrettes, or blend them up to make a chive pesto. The options are endless!

Store your chives wrapped in a damp paper towel in a zip-lock baggie in the fridge. They will keep fresh for up to 2 weeks.

2. Frozen Chives
Freezing your chives is the easiest and quickest way to preserve your harvest into the next season, especially when your chive plants have gone dormant.
There’s nothing fancy to it. Place your chopped chives in an airtight container and store them in the freezer for up to 6 months.

Frozen chives don’t require any defrosting. Simply sprinkle them on top of your finished dish like you would with fresh chives. The delicate leaves will instantly defrost upon contact with warm food.
3. Dried Chives
Drying your chives is a great way to preserve them for even longer – we’re talking 2-3 years!

You can do it the lazy way and let your chopped chives air dry on the counter for up to a week, but I prefer to bake them – it’s easy and takes barely any time.
- Preheat your oven to its lowest setting (I set mine at 170° F).
- Spread freshly chopped chives into a thin layer on a baking sheet lined with parchment paper or a silicone baking mat.
- Place in the oven and allow them to dry until they easily crumble apart when you gently pinch them. This process generally takes about an hour, but check on them every 10-15 minutes to track their progress.


Store dried chives in an airtight container in a dark place for up to 3 years.
Use them in any recipe that calls for fresh chives, just reduce the dried amount to 1/3 of the fresh amount (ex. 3 tablespoons of fresh chives = 1 tablespoon of dried chives).

Dried chives also make for an impressive homemade gift. Reuse a spice container from the store, give it a cute label, and tie it with a ribbon (maybe add a recipe card with it) – who wouldn’t love this as a little gift?!
4. Chive Compound Butter
Making compound butter is a creative way to use and store chives (and any other herbs and edible flowers). It sounds fancy but is very simple to make and can be incorporated into almost any dish.

The compound butter can be pre-sliced and stored in the freezer so you always have this delicious addition on hand.
Ingredients
- 1/2 cup softened unsalted butter
- 4 tablespoons minced herbs (I used chives and parsley)
- 1/4-1/2 teaspoon sea salt
Instructions
- In a bowl, simply mix together softened butter, herbs, and salt.
- Use the compound butter right away or store it in an airtight container in the fridge for up to one week.

Make pre-portioned pats of compound butter:
- Transfer the butter mixture onto a sheet of plastic wrap or parchment paper and roll it into a log (about 4 inches long).
- Twist the edges to seal in the sides like a candy wrapper.
- Chill in the fridge until firm (about 2 hours).
- Slice into discs.
- Store in the fridge for up to one week or in the freezer for up to 6 months.

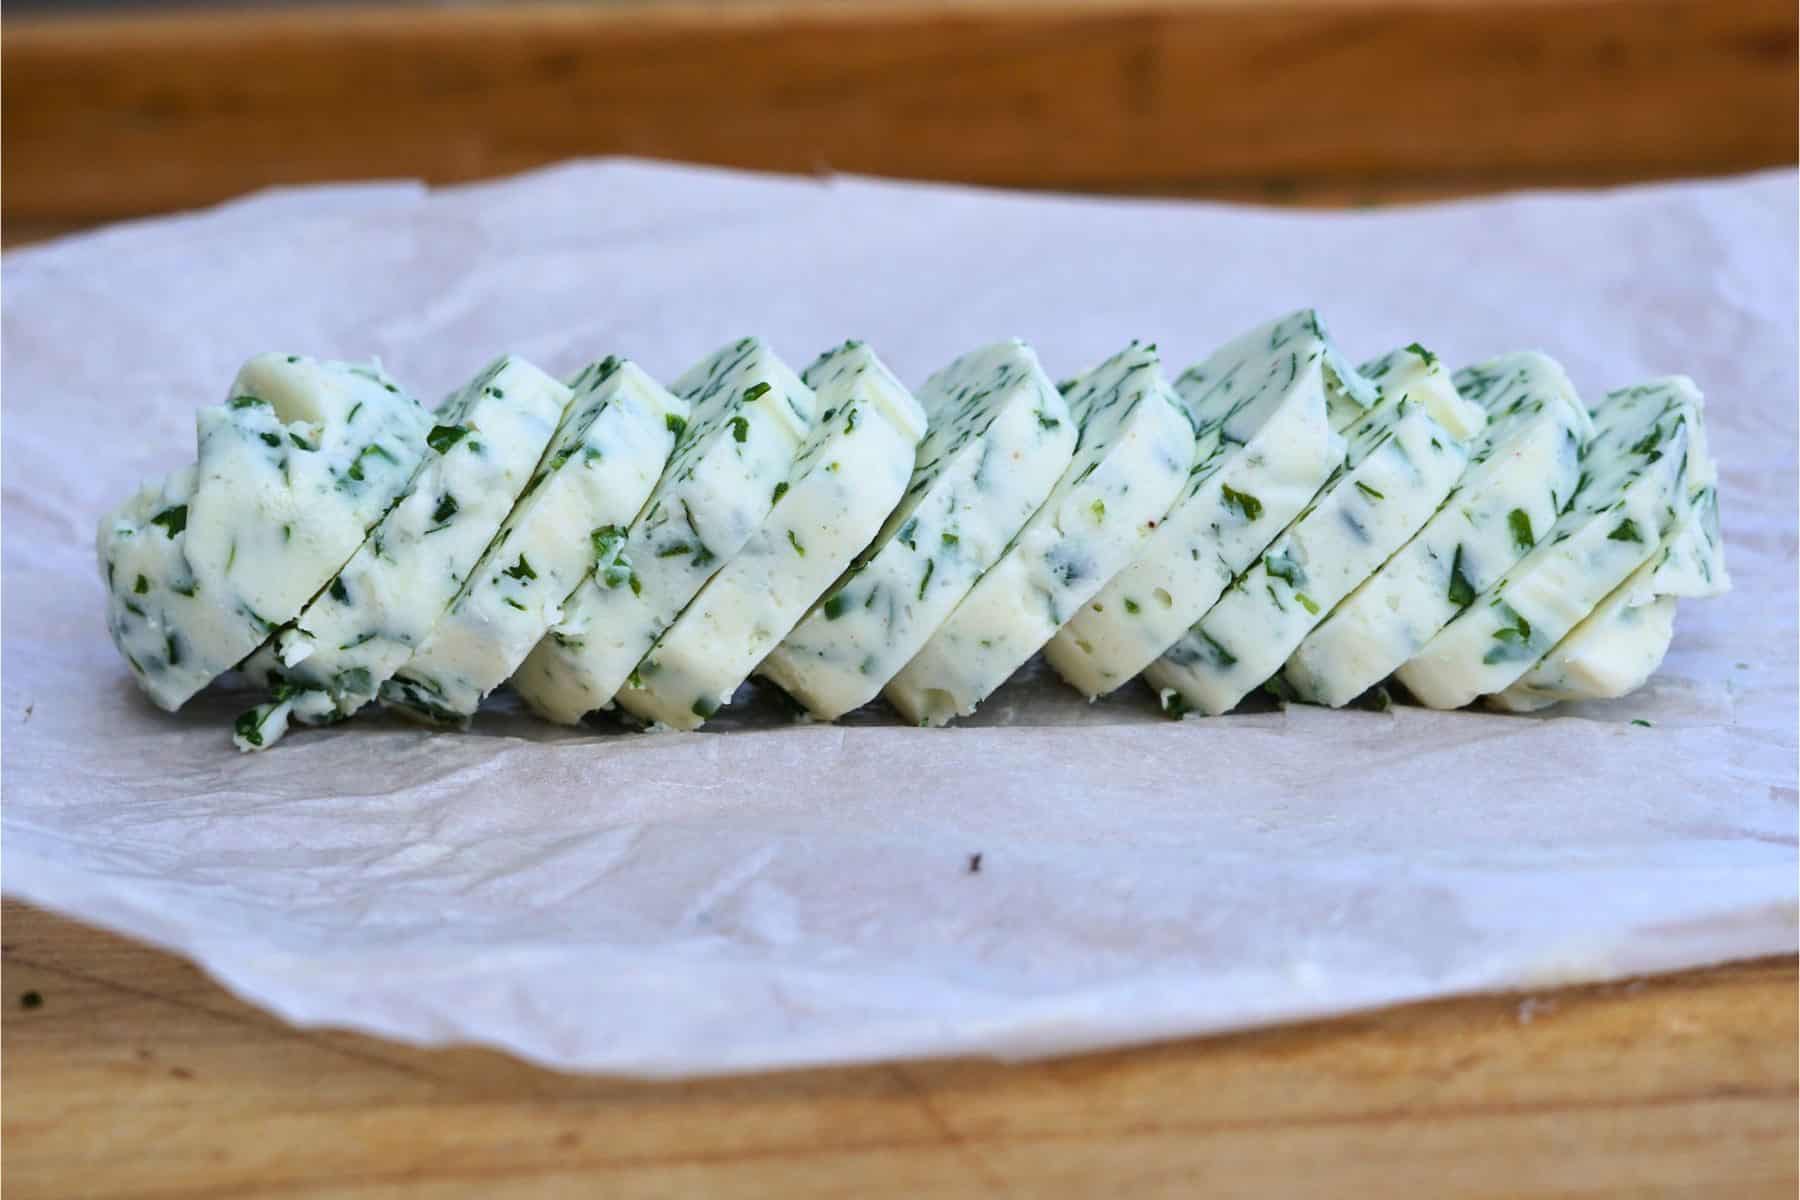
Ways to use your chive compound butter
- Slather onto corn on the cob, top baked or mashed potatoes, or mix into pasta.
- Spread it onto some bread, top with grated parmesan cheese, and broil for the best homemade garlic bread alternative.
- Use it to sauté fresh, seasonal vegetables.
- Baste compound butter on pan-seared or grilled steak, chicken, or pork chops (my husband’s favorite).

5. Chive Salt
Last but not least, creating a chive-infused salt is another great way to preserve your harvest for an extended period, since salt is a natural preservative.
Made with only two ingredients, this chive salt is beyond simple to make and much healthier than any store-bought seasoning mix. It can even make for the perfect homemade gift.

- Start by combining equal parts chopped chives and coarse sea salt (or kosher salt) in a food processor (I like to do one cup of each).
- Pulse the contents in the food processor until its texture resembles that of soft sand.
- Spread the chive salt evenly onto a sheet pan lined with parchment paper or a silicone baking mat.
- Bake at 200° F for 25-30 minutes, stirring it with a spatula halfway through.
- After 30 minutes, turn off the oven and leave the chive salt inside with the door closed until the oven cools off completely.
- Store in an airtight container in a cool, dark place for up to 1 year.
Chive salt adds a great dimension of flavor to almost any savory dish – use at the end of a recipe wherever you want a slightly salty and subtle onion flavor.
- Add to homemade spice blends or rubs for proteins and veggies.
- Finish off freshly popped popcorn or homemade fries.
- Use as a finishing salt on cooked meats or fish.
If you’re as chive-obsessed as I am, check out How To Grow Chives (The Easiest Herb) – for those who are convinced they can’t grow anything, this plant will prove you wrong.

Thanks for reading! Let me know in the comments how you like to preserve your chives – I’m curious to hear!


Leave a Reply