
Stop buying your herbs at the grocery store! Follow these 3 simple steps to start a small herb garden and grow fresh herbs all year long.
Let’s be honest: we all know how overpriced those little plastic containers of herbs are at the grocery store. And truthfully, most of the time, they likely will rot in the back of your fridge before you get around to using them (I speak from experience).
Instead of overpaying for those little packets of herbs, you can spend the same amount of money (plus a little for a pot and some soil) and start a small herb garden to grow over a year’s supply of those herbs at home.
Herbs were the very first plants I ever grew as a new gardener. Even to this day, tending and harvesting from my herb garden brings me so much joy, and I promise that starting your own small herb garden will be such a fulfilling experience.
I’ll walk you through step by step, from choosing which herbs are best for your space to purchasing your supplies and planting your first small herb garden. Let’s do it!
Why You Should Start a Small Herb Garden
- Homegrown herbs are unmatched: Nothing is more satisfying than picking fresh, homegrown herbs and using them immediately in the kitchen. They taste exponentially better (and are much better for you) than herbs from the store. Most, if not all, provide invaluable health benefits and have been used as medicine for centuries.
- Anyone can grow herbs: Never grown anything before? Herbs are the perfect place to start since they are some of the easiest plants to grow! In general, herbs are pretty resilient and aren’t super picky about the space or care you provide (or lack thereof).
- You’ll save money: Starting a small herb garden at home means you can grow and harvest fresh herbs all year long so you’ll no longer need to buy them again and again.
- Homegrown herbs are the gift that keeps on giving: Depending on the herbs you choose to grow, you’ll likely have some perennials in the mix. This means that you’ll only have to plant them once. After they die back in the winter, they’ll magically return in the spring year after year.

Step 1: Do a Bit of Prep Work
Create a simple plan by asking yourself a few easy questions. This basic step will help you select the best herbs to grow and save you lots of time and frustration in starting your herb garden.
“Which Herbs Do I Use the Most?“
The best herbs to grow are the ones you use the most.
Think about the recipes you cook consistently and what herbs you frequently purchase. Maybe there’s an herb that you love to use but is almost always out of stock at the store.
Make a list of these herbs that come to mind. Herbs do best when grown together in the same space, so I recommend choosing at least 2-3. If you’re an herb-lover like me, your list will contain 8+ favorites.
Small Herb Garden Ideas
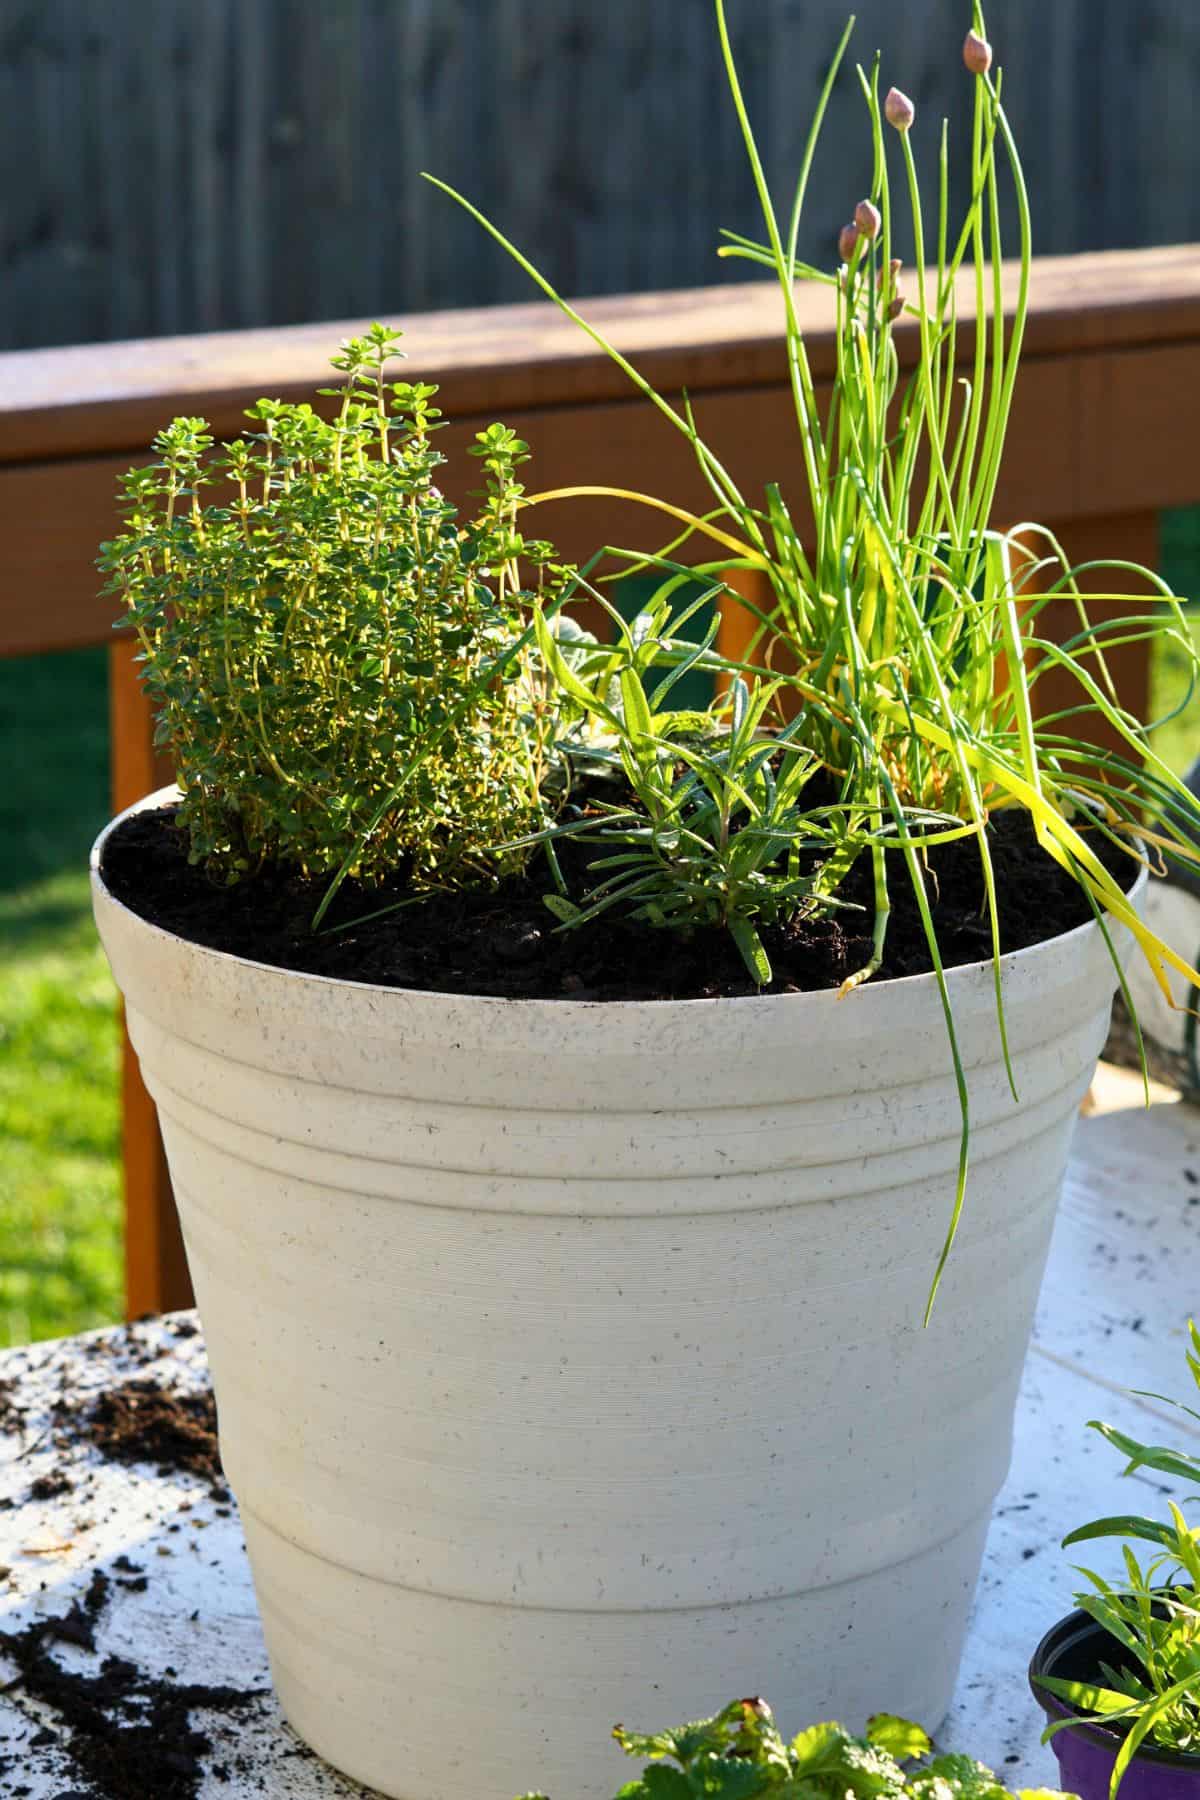
- The All-Purpose Herb Garden: thyme, sage, rosemary, chives, basil, cilantro, parsley, tarragon, dill
- Pizza & Pasta Herb Garden: basil, oregano, thyme, rosemary, parsley
- Tea-Lover’s Herb Garden: mint, thyme, basil, sage, chamomile, echinacea, lemon balm, lavender
- Medicinal Herb Garden: sage, thyme, calendula, echinacea, lavender, chamomile, rosemary, mint
Assessing the growing space of your herb garden will help you narrow down your selection.
“What Kind of Growing Space Do I Have?”
You can grow a small herb garden in whatever space you have.
Maybe you live in a suburban home with a large patio or backyard with room for a raised bed. Or perhaps you live in a small city apartment with a tiny balcony that would benefit from a small pot of herbs.
Jot down a few notes about your growing space. Consider what size container will work in your space and how much sunlight it will get throughout the day.
Almost all herbs grow best in full sun, but some will happily grow in partial shade. If your space allows, aim for at least 6 hours of direct sunlight per day.

“Which Herbs Will Work in My space?“
Using your list of favorite herbs and any notes on your growing space, consider which herbs you want to grow in your herb garden.
Although this isn’t necessary to get started, it’s helpful to know which ones are annuals vs. perennials.
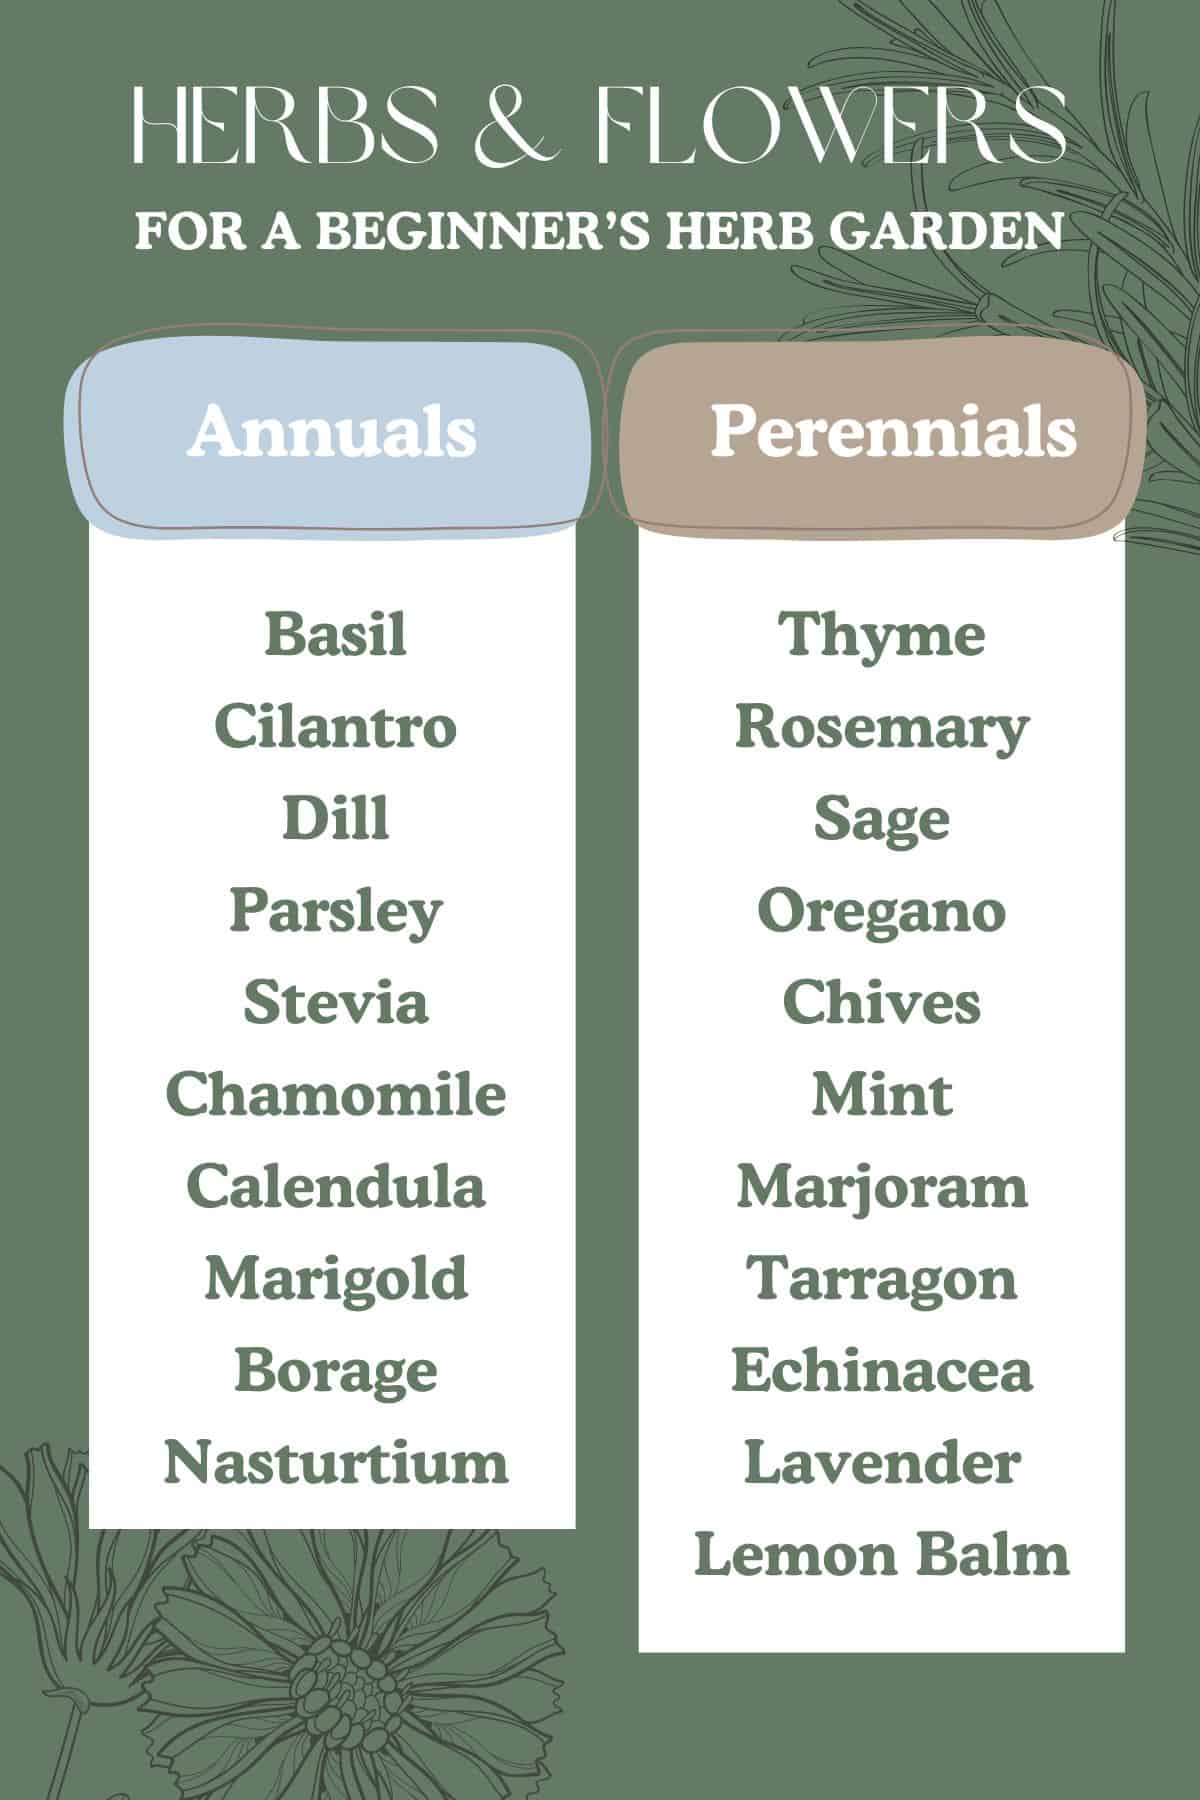
Annuals are plants that complete their life cycle in one season and will require you to replant it every year. Annuals are “frost-tender”, meaning any light frost or low temps will likely kill the plant. For example, basil will shrivel up and die any time the temp drops below 50°F.
Perennial herbs are “frost-hardy” as they can tolerate cooler temps. They will go dormant during the coldest months, but will likely return in the spring without any work on your part. (You can do a quick Google search to see if a certain herb will grow as a perennial based on where you live.)
It’s important to pick the right-sized container based on your growing space and how many herbs you’ll be growing.
Herbs vary in size, but the general rule of thumb is to allow each herb one gallon of potting mix.
- 3-4 herb plants: 12-inch pot (about 3 gallons)
- 5-6 herb plants: 16-inch pot (about 5 gallons)
- 7-8 herb plants: 20-inch planter (about 7 gallons)
Most garden centers carry a wide variety of pots to choose from. However, if you have your heart set on a larger herb garden, I suggest shopping around online for something like a rolling planter or raised bed (or build one yourself).

Step 2: Collect Supplies For Your Small Herb Garden
Load up and head to your local garden center!
Your shopping list includes:
- Herbs you want to grow
- A container that is large enough for all your herbs
- Enough soil to fill your container
Pick Your Herbs
Grab yourself a cart, wander over to the herb section, and get to shopping.
A little advice on picking the best herb seedlings:
- Select plants with healthy, tender green leaves
- Check the stems to make sure they are strong and sturdy.
- Go for ones that are bushier versus ones that are taller (aka “leggy”).
- Gently pull the plant out of the container to make sure the roots are well intact.
- Skip on the ones with yellow, wilted, or curling leaves.
Don’t forget to smell the herbs! Sounds funny, I know. But each herb you choose should give off its quintessential scent.
You might notice there are a few different varieties of a certain herb. Oftentimes, the plant tag will tell you a bit about the variety and its growing habit. If not, a quick Google search will give you everything you need to know.

Select The Best Container
It’s important to keep in mind that your herbs will double or triple their size throughout the season so make sure to pick a pot that’s big enough to fulfill their needs.
Scroll up a bit to see what size container you’ll need based on how many herbs you’ve selected.
Choose a pot that is at least 12-inches deep with drainage holes at the bottom so that your herbs don’t become waterlogged.
Terra-cotta pots are best for most herbs, but the container material doesn’t matter as much as its correct size (and being budget-friendly).
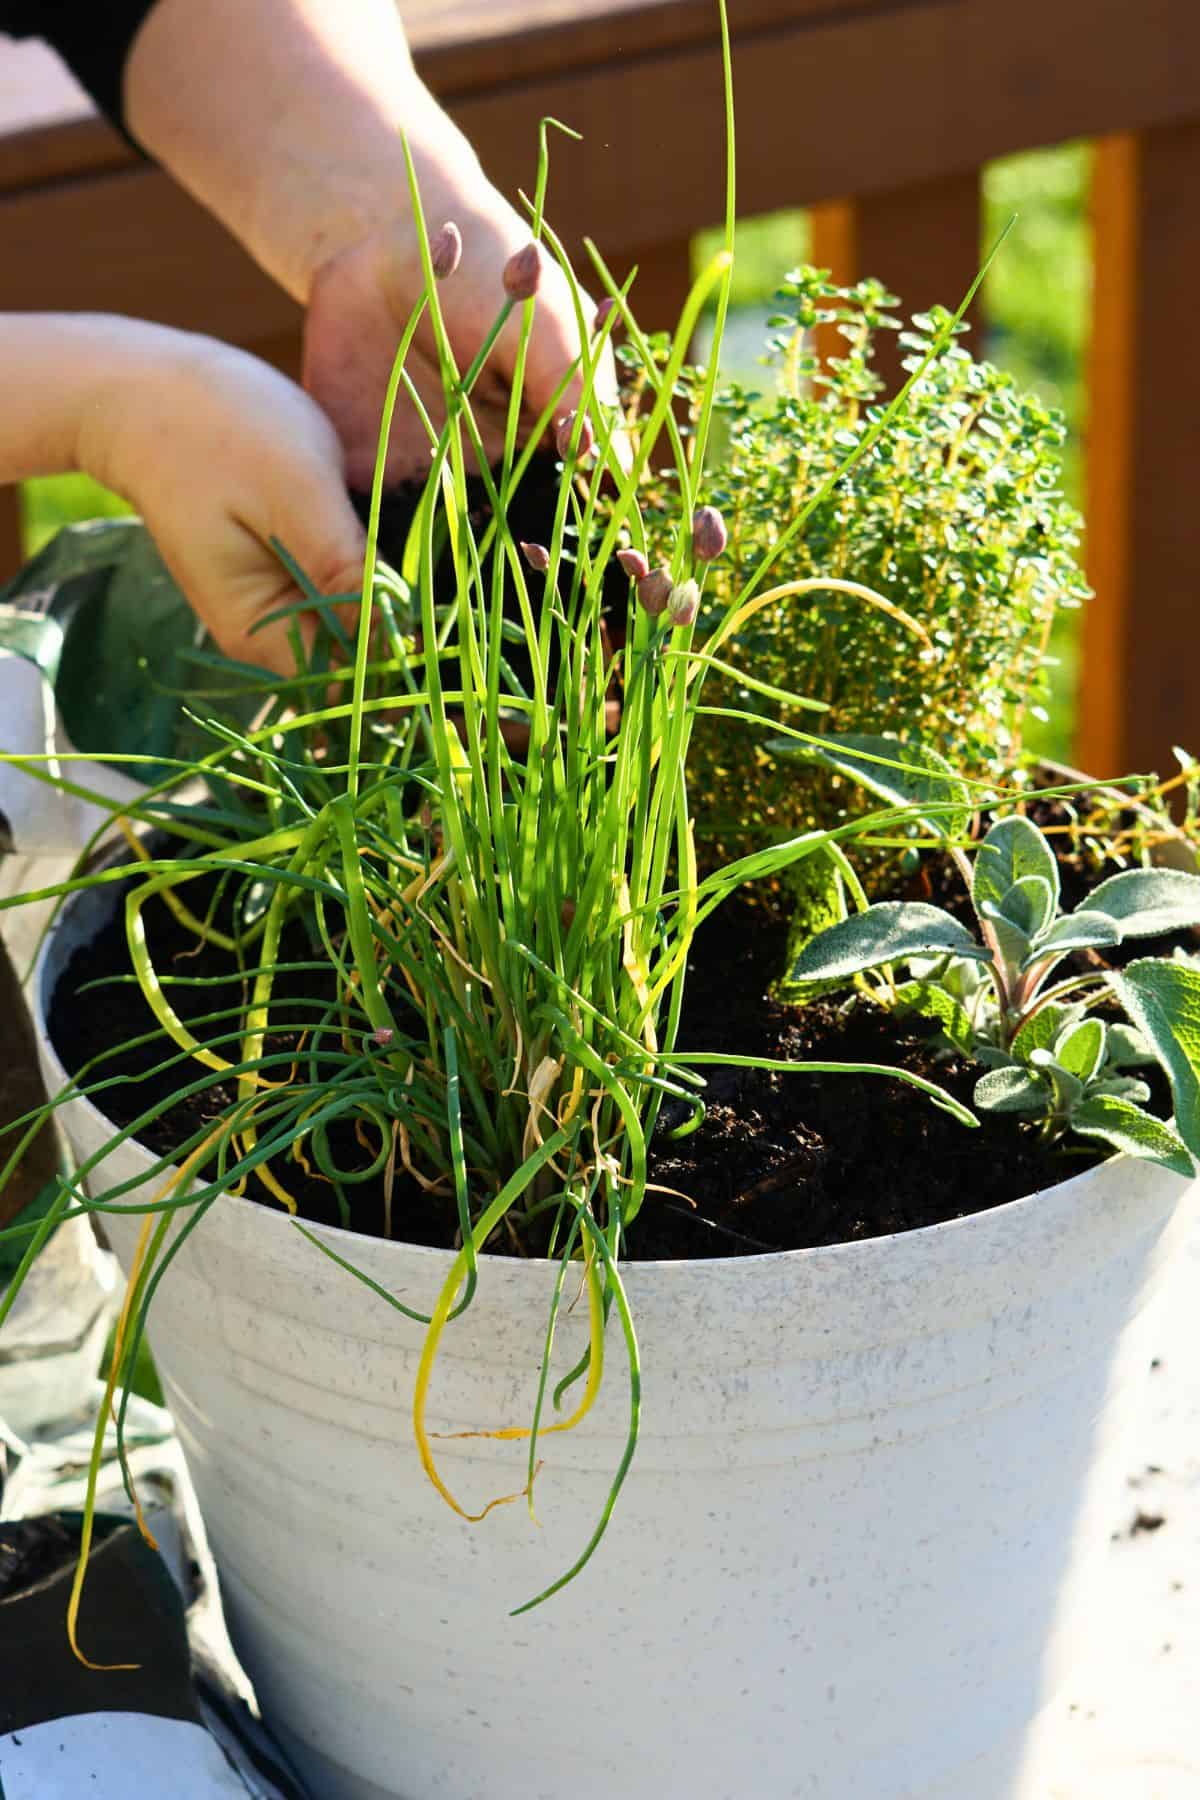
Note: If you’re interested in growing mint or lemon balm, I suggest giving it its own container if your budget allows. They are extra-vigorous growers that tend to take over the container, choking out other plants.
Grab a Bag of Soil
Most herbs prefer well-draining soil full of organic matter.
If gardening in a smaller pot, you will want to choose a bag of high-quality potting soil (preferably organic) that contains the correct ratio of ingredients to support nutrients, water retention, and proper drainage.
If filling a larger raised bed for your herb garden, I recommend mixing equal parts topsoil and compost plus a little coarse sand to help with drainage. You can also sprinkle some earthworm castings into the mix to provide extra nutrients for super-stunning herbs.
Step 3: Plant Your Kitchen Herb Garden
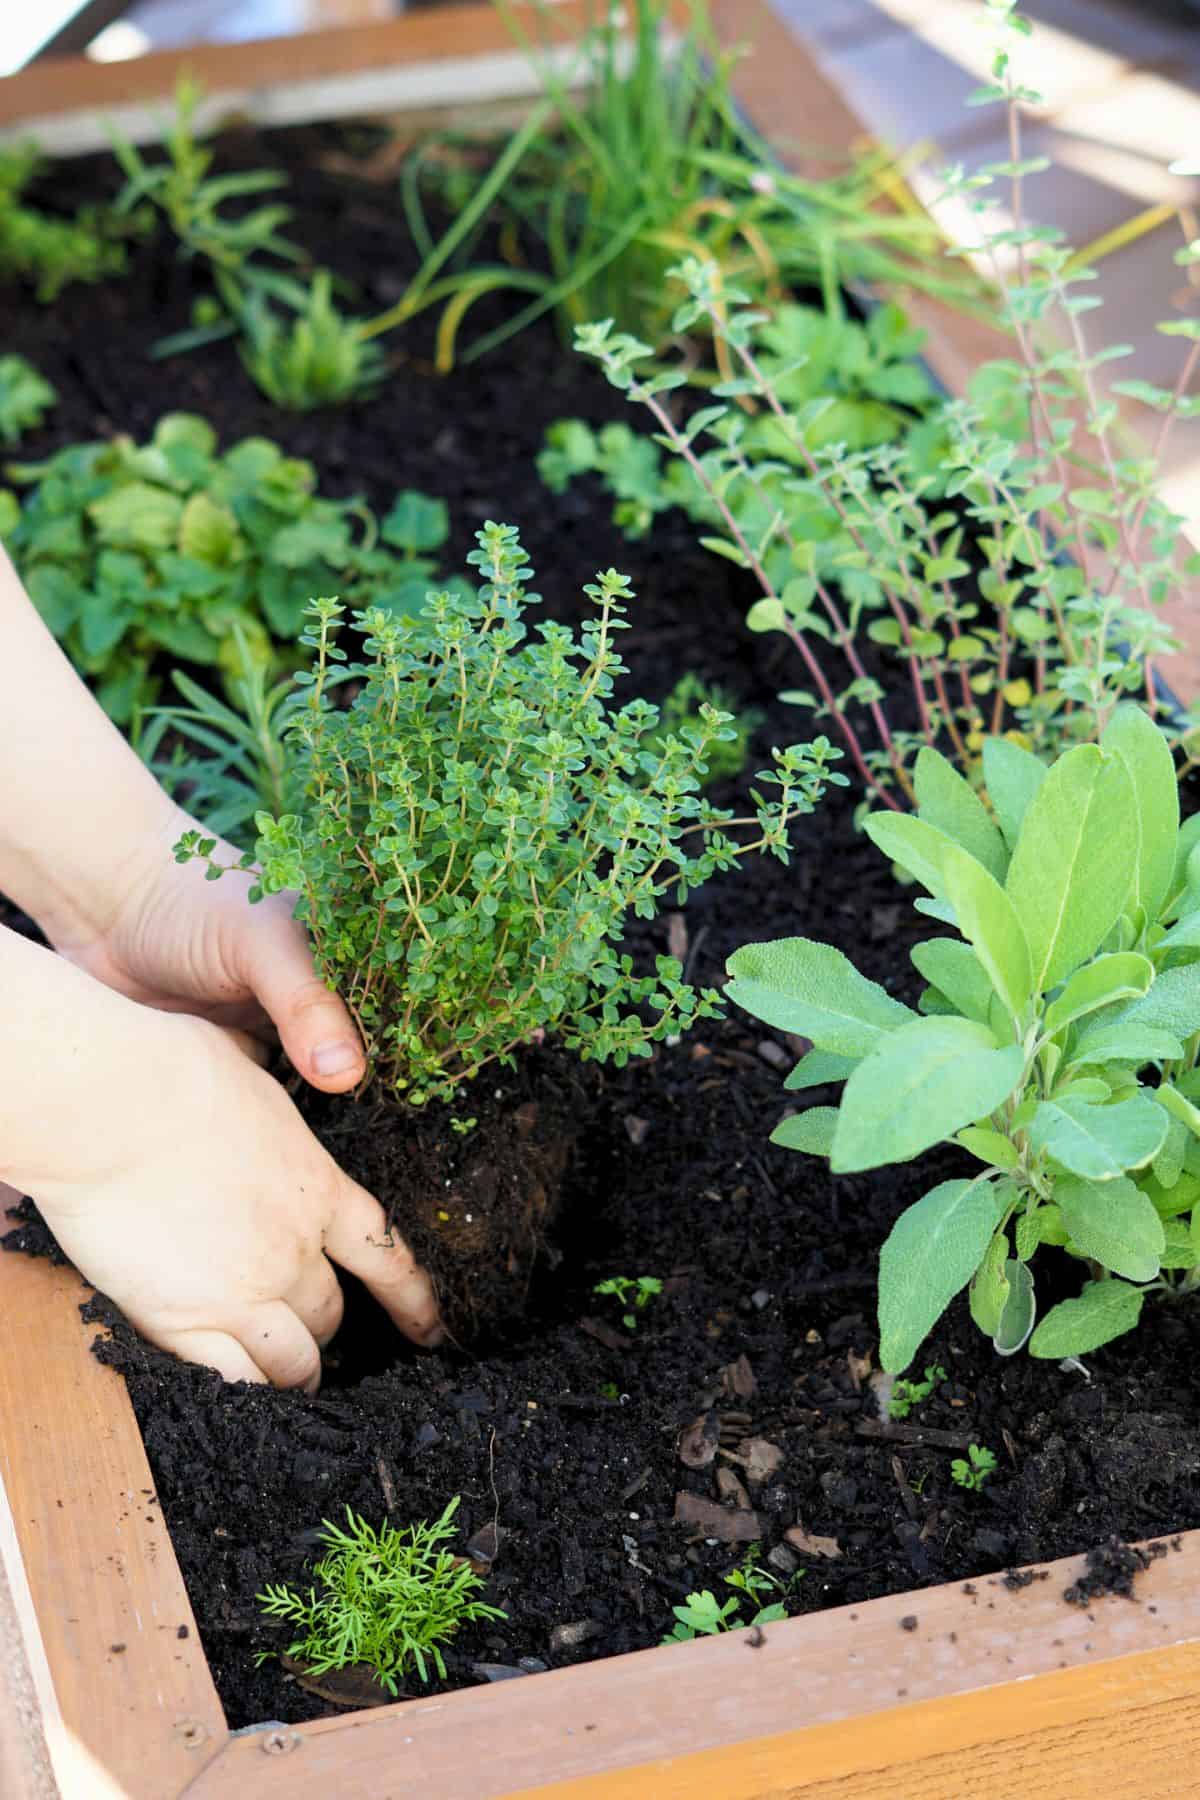
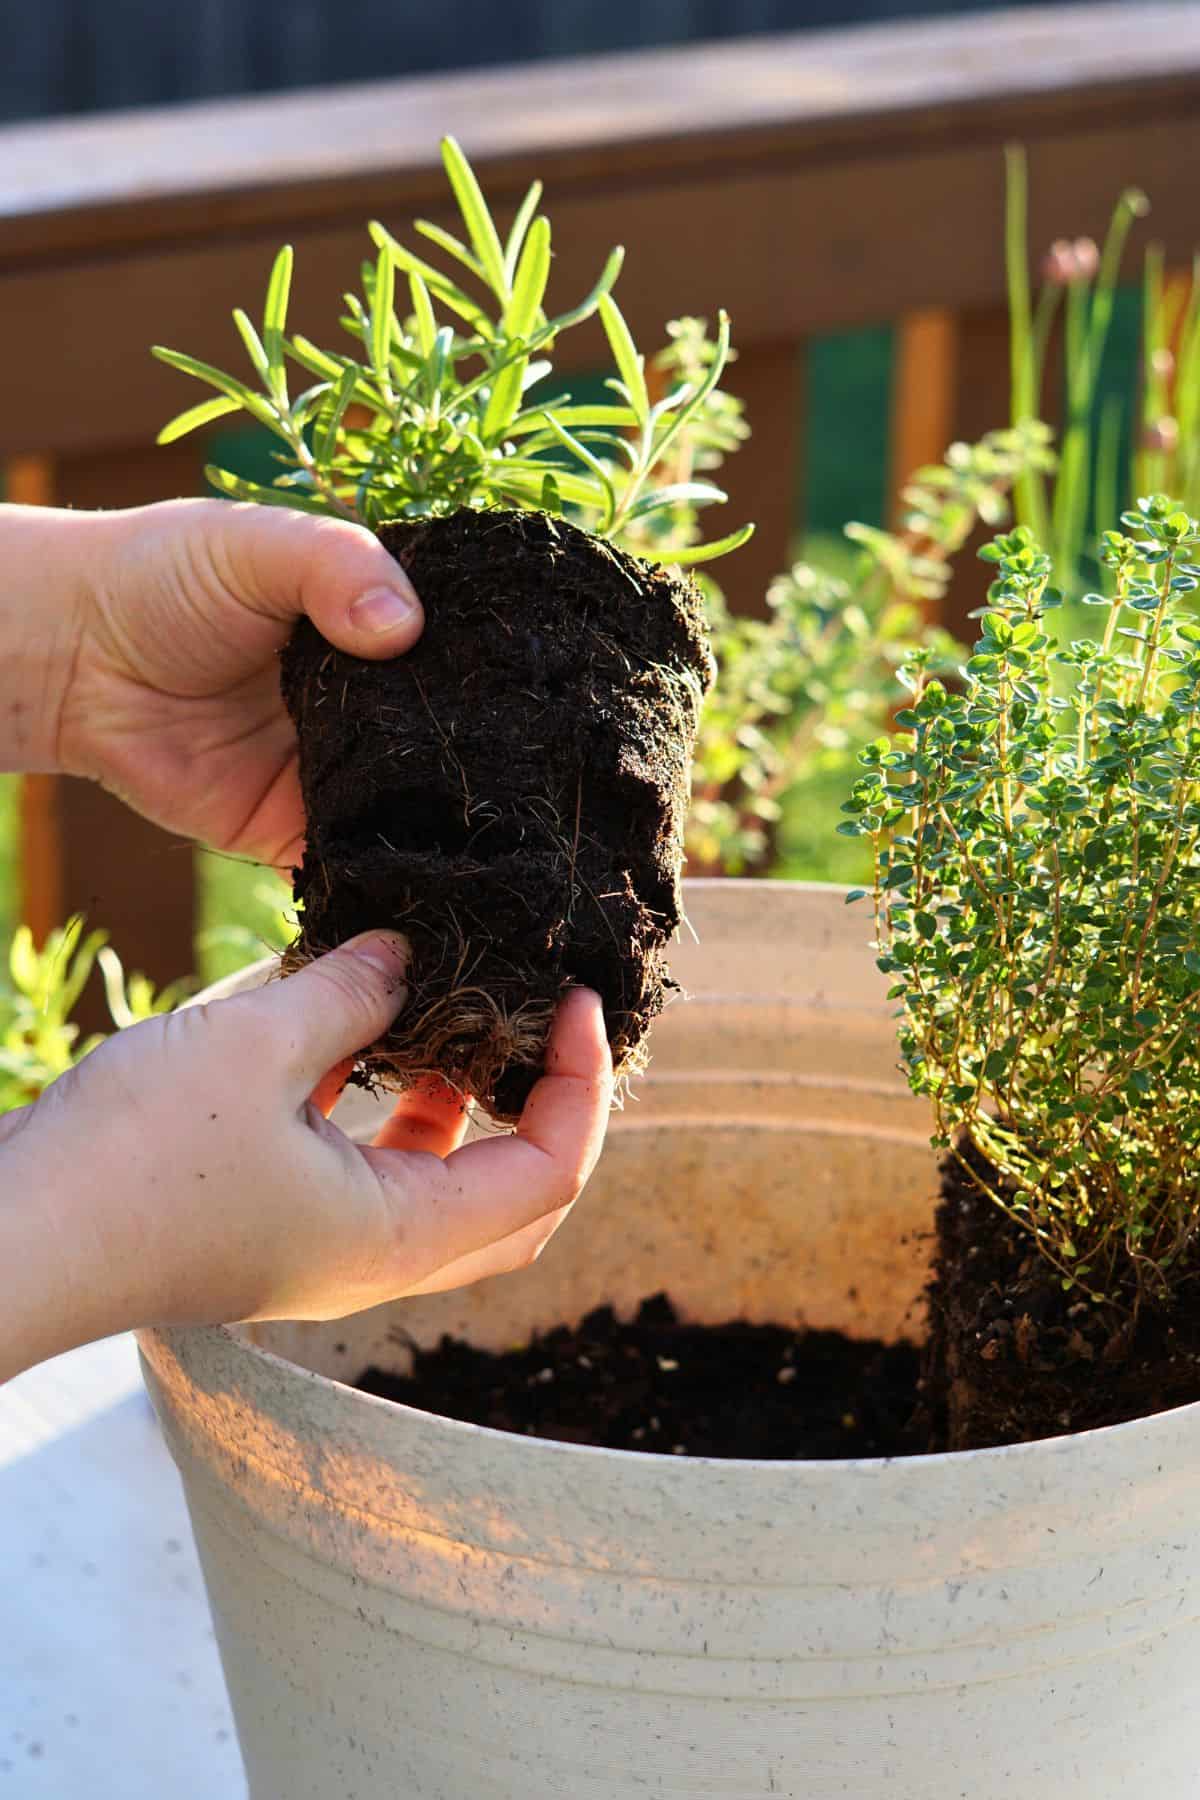
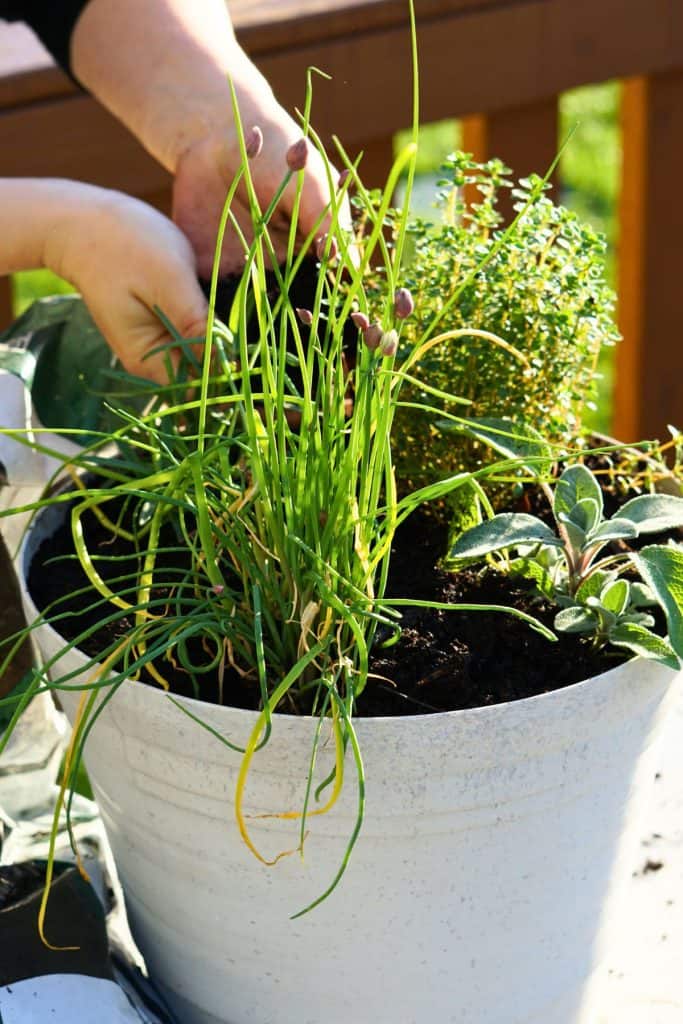
Just before you plan to plant your herb garden, give your seedlings a little watering. This step will make it easier to remove the seedlings from their pot and will prep the roots for their new home.
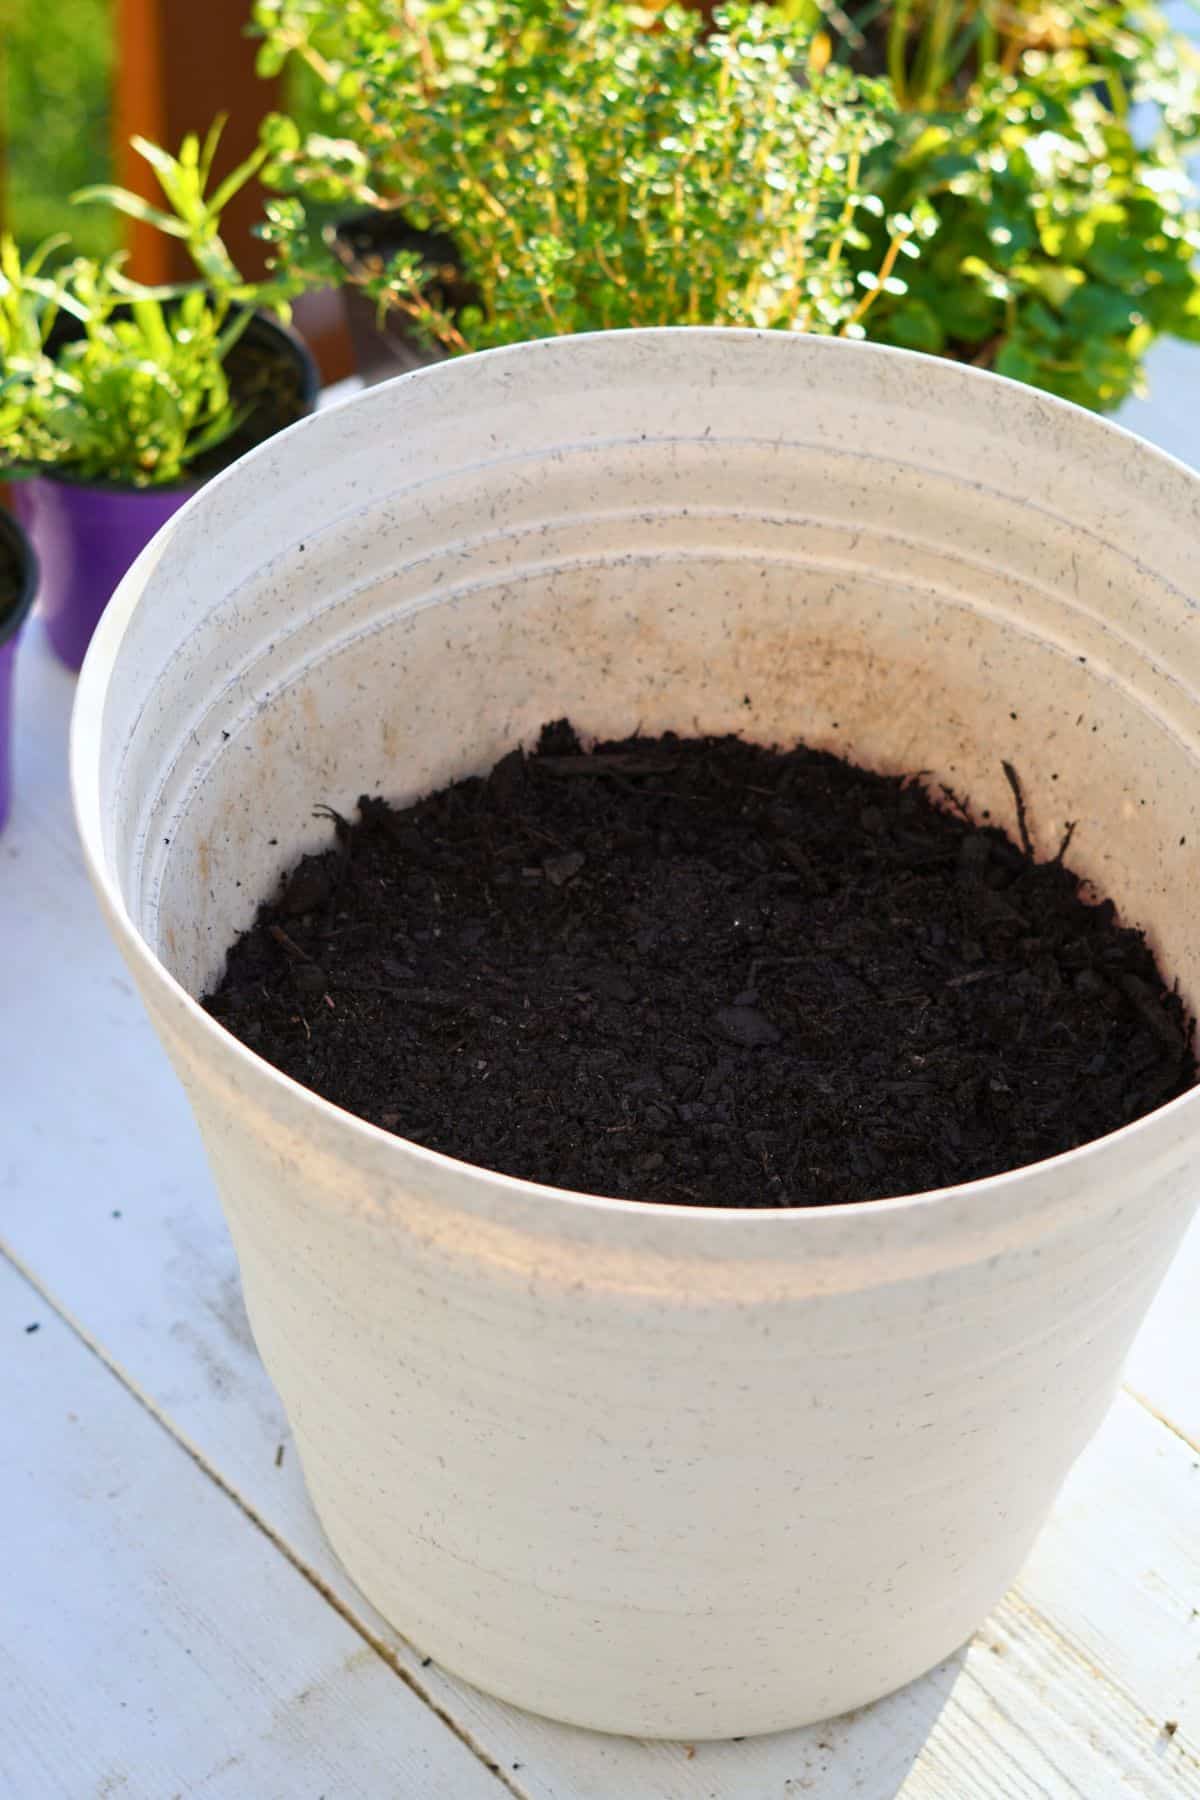
Start planting your herb garden by filling your container about two-thirds full of soil.
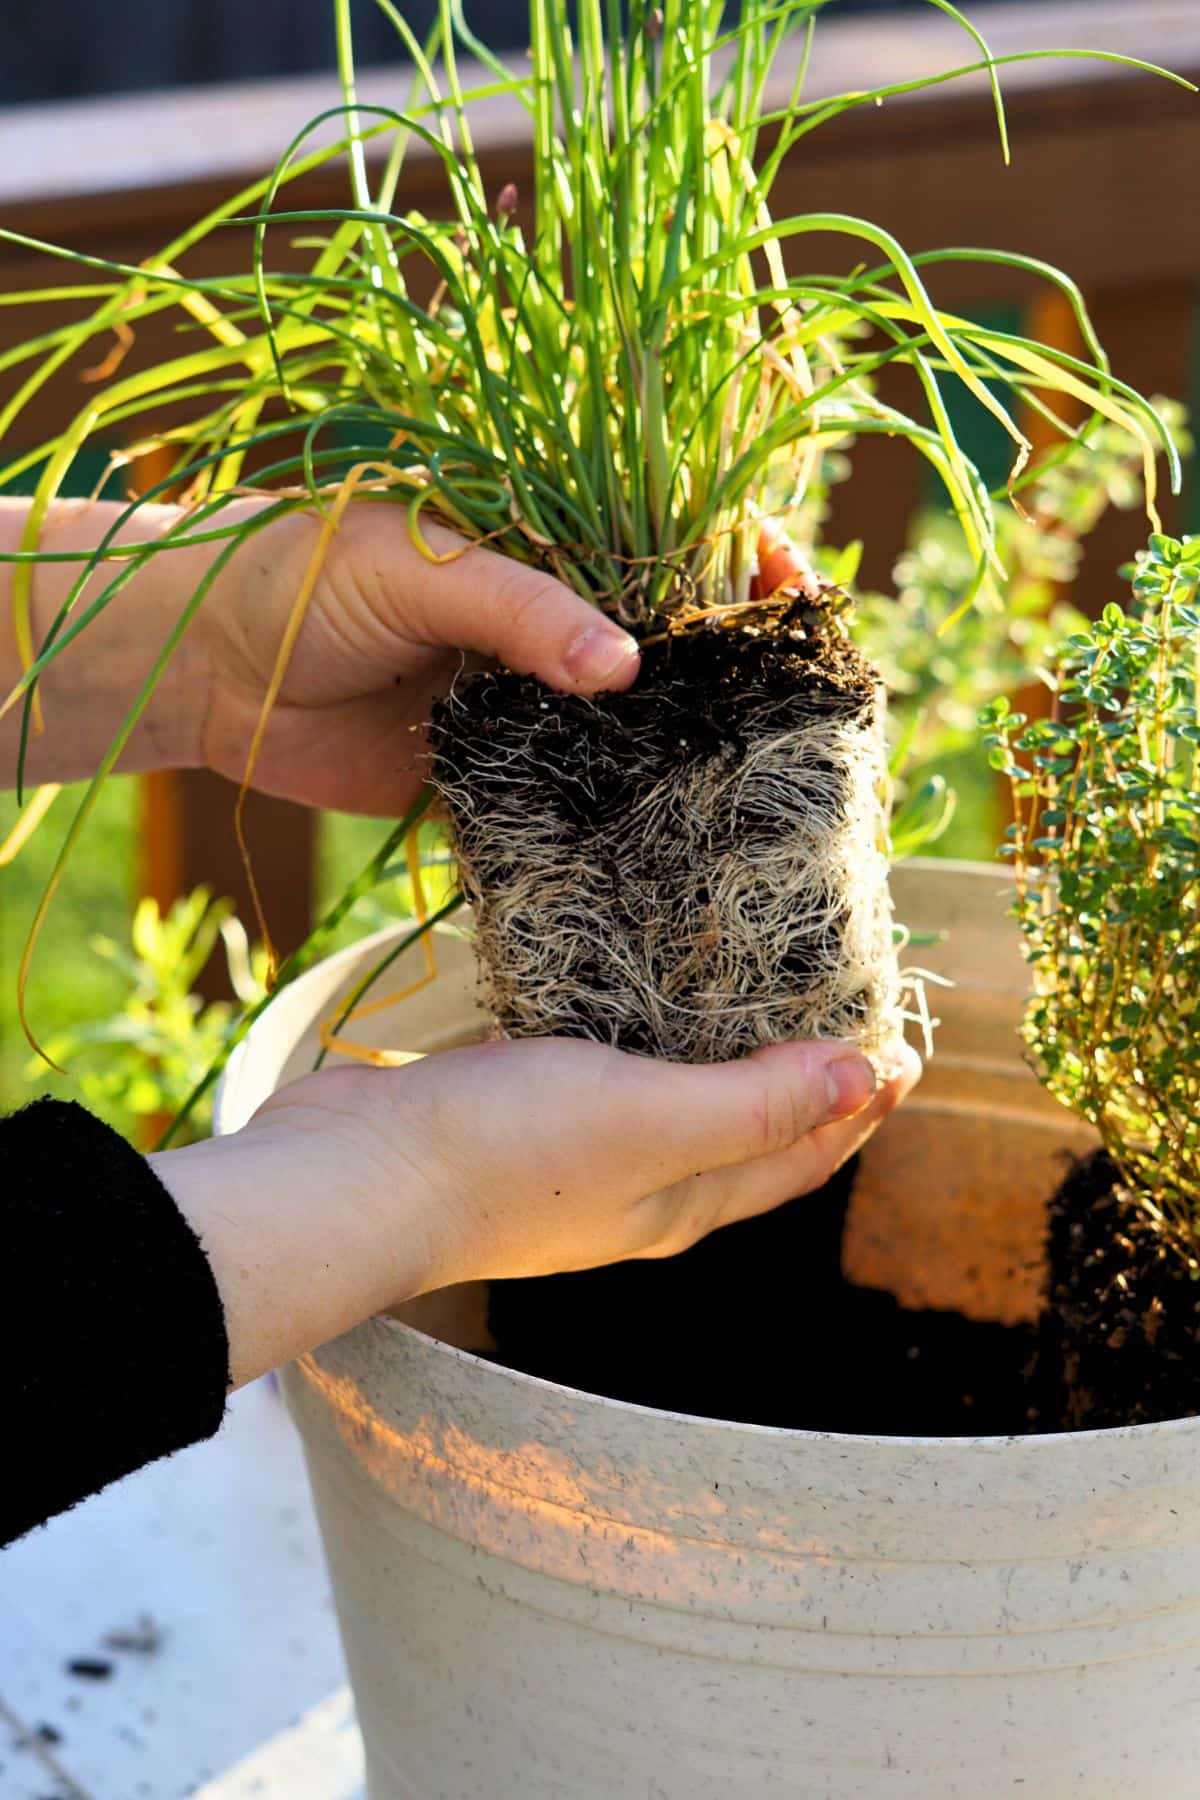
Gently remove herb seedlings from their pots by holding them near the stem. Lightly tease the bottom of the root ball apart. Root-bound seedlings (like the one on the right) may require a little extra teasing.
Place your herbs upright into the pot about 6-12 inches apart.
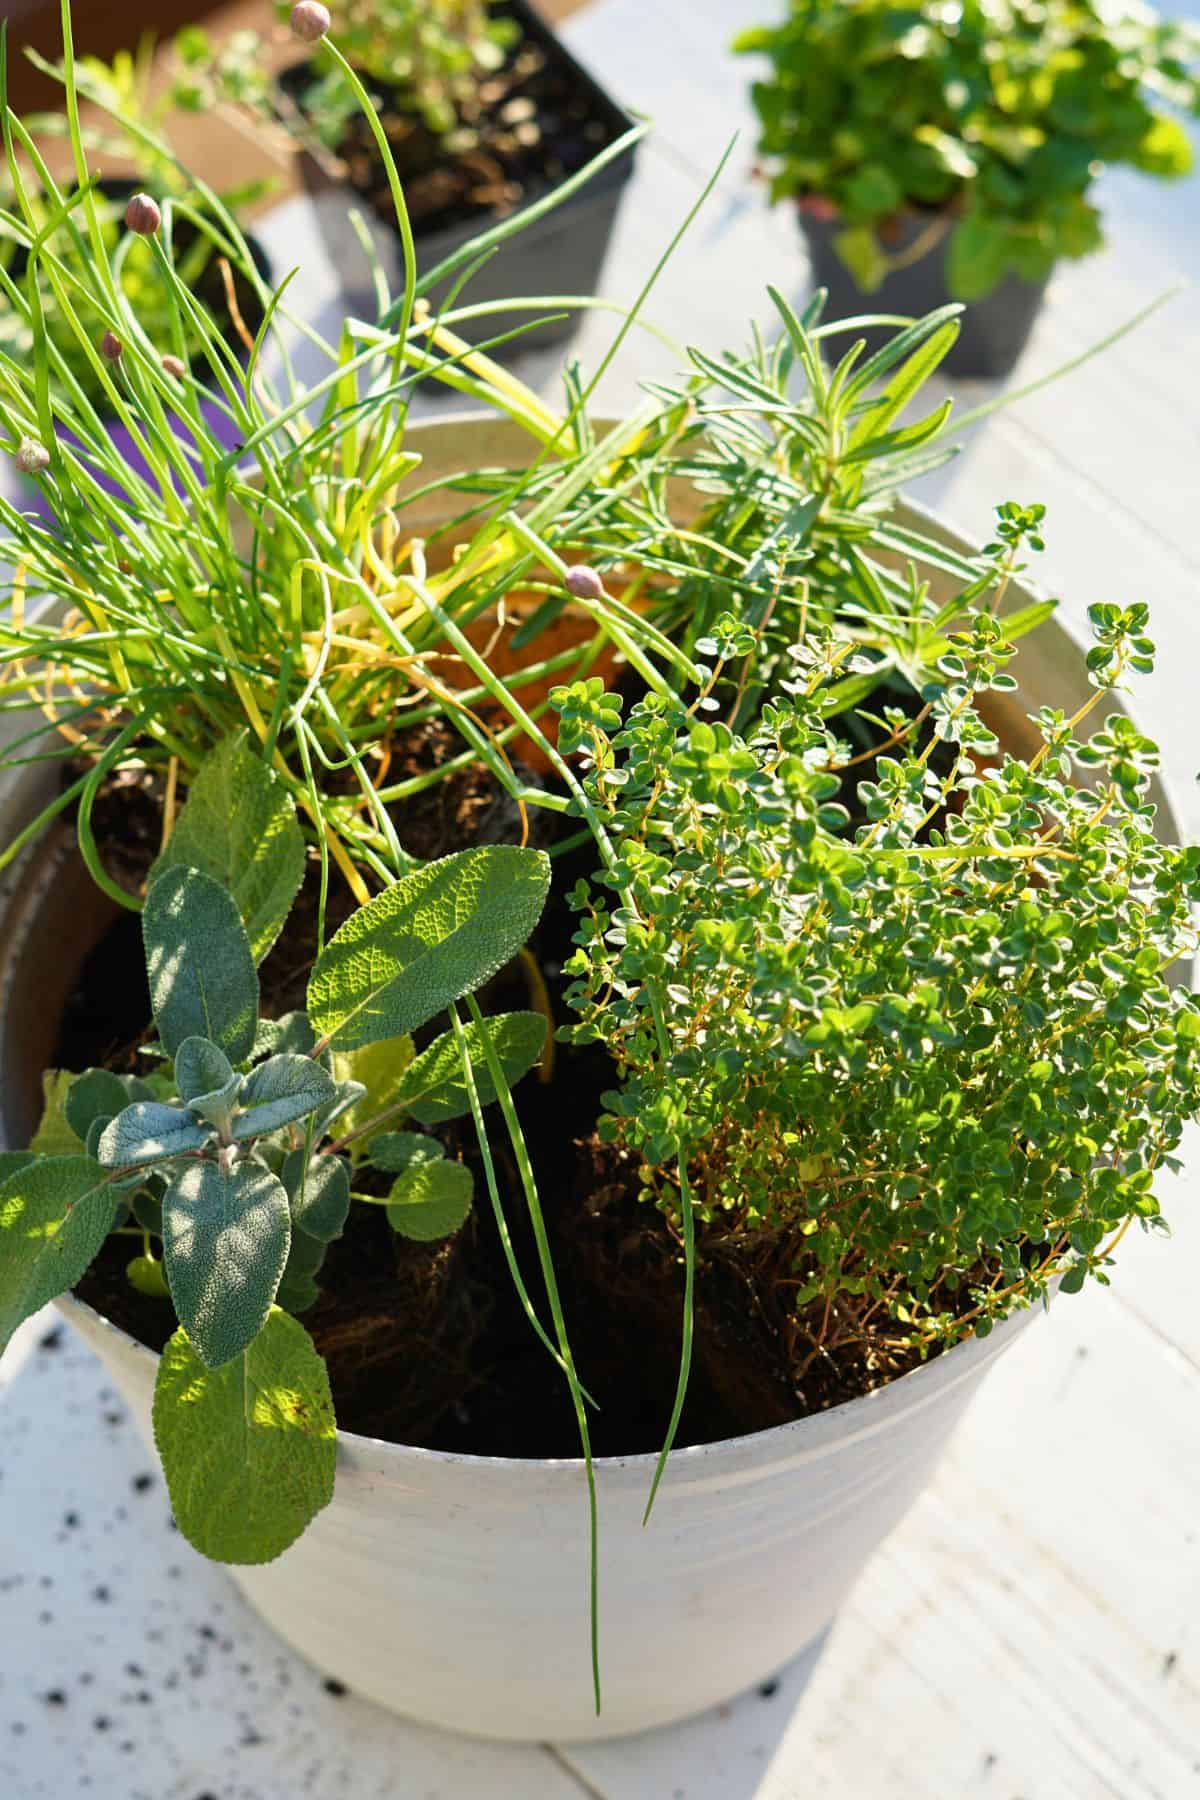
Use the remaining soil to fill in the empty spaces around the herbs and firmly press the soil down around each plant base. Make sure your soil level is below the rim of the container to prevent overflowing during watering.
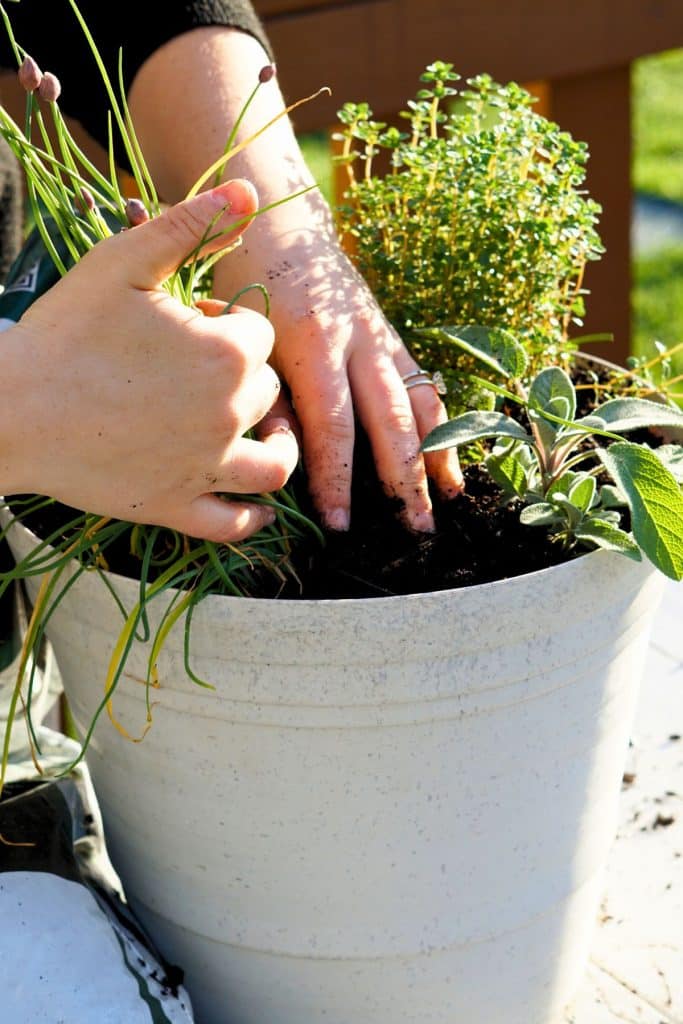
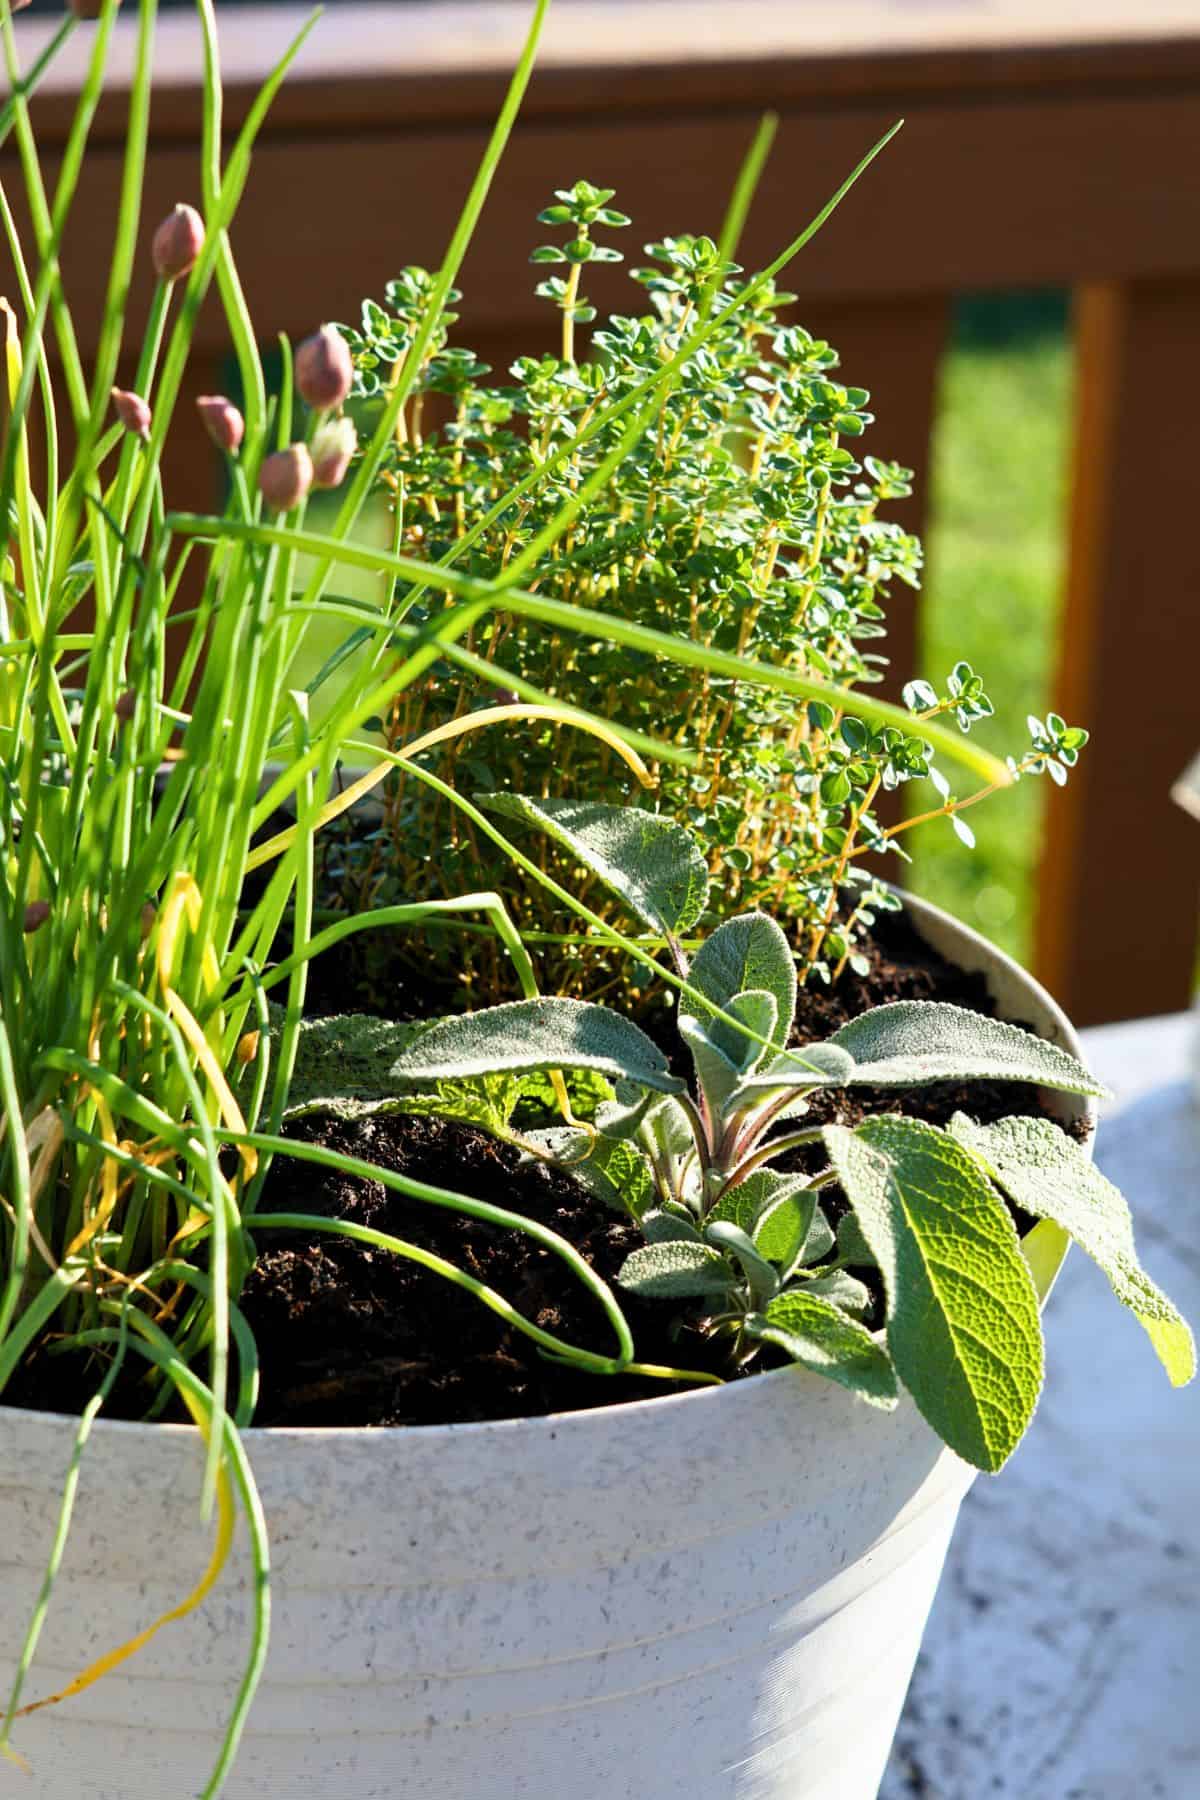
Give your herb garden a generous watering to help the roots settle into their new home and prevent transplant stress.
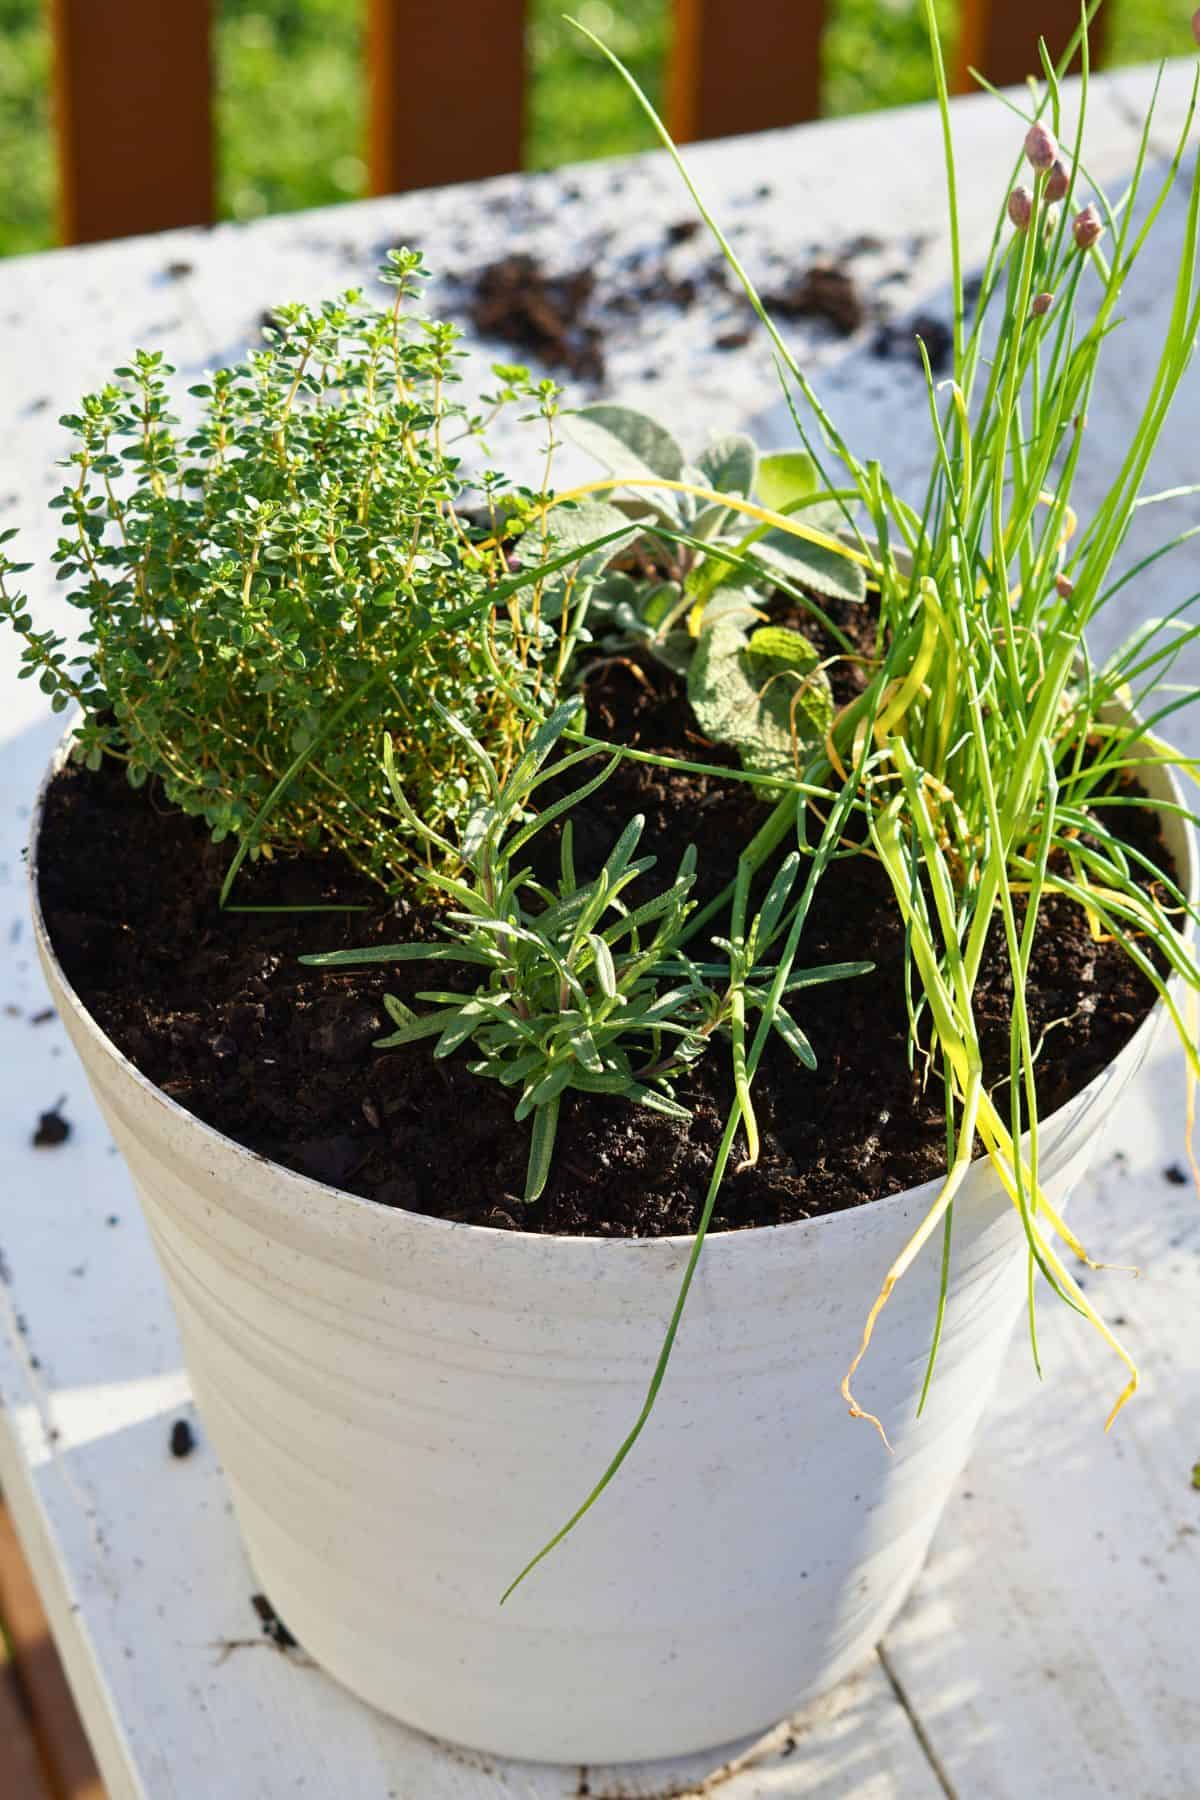
Finally, take a step back and admire your beautiful new herb garden! You did it!
Now That You’ve Started Your Herb Garden…
- Water only as needed: The best way to tell your herb garden needs watering is to stick your finger about 2 inches deep into the soil. If it feels dry, give it a drink. If it still feels damp, check again in a few days. It’s that simple – don’t overthink it.
- Harvest often: After giving the herbs a few weeks to settle into their new home, you can begin harvesting from them. You can trim up to 1/3 of the plant at a time, and afterward, give it some time to grow back a bit. Smaller, more frequent pickings stimulate the plant to grow taller and bushier. The more often you trim, the more you get.
More Learn-To-Grow Guides
- How To Grow Chives (The Easiest Herb)
- 3 Easy Leafy Greens Anyone Can Grow
- 5 Quick Tips for Growing Cilantro From Seed All Season Long

Simple Ways To Use Homegrown Herbs
- Spinach and Chive Pesto
- Grilled Corn and Black Bean Dip
- Homemade Greek Yogurt and Herb Ranch
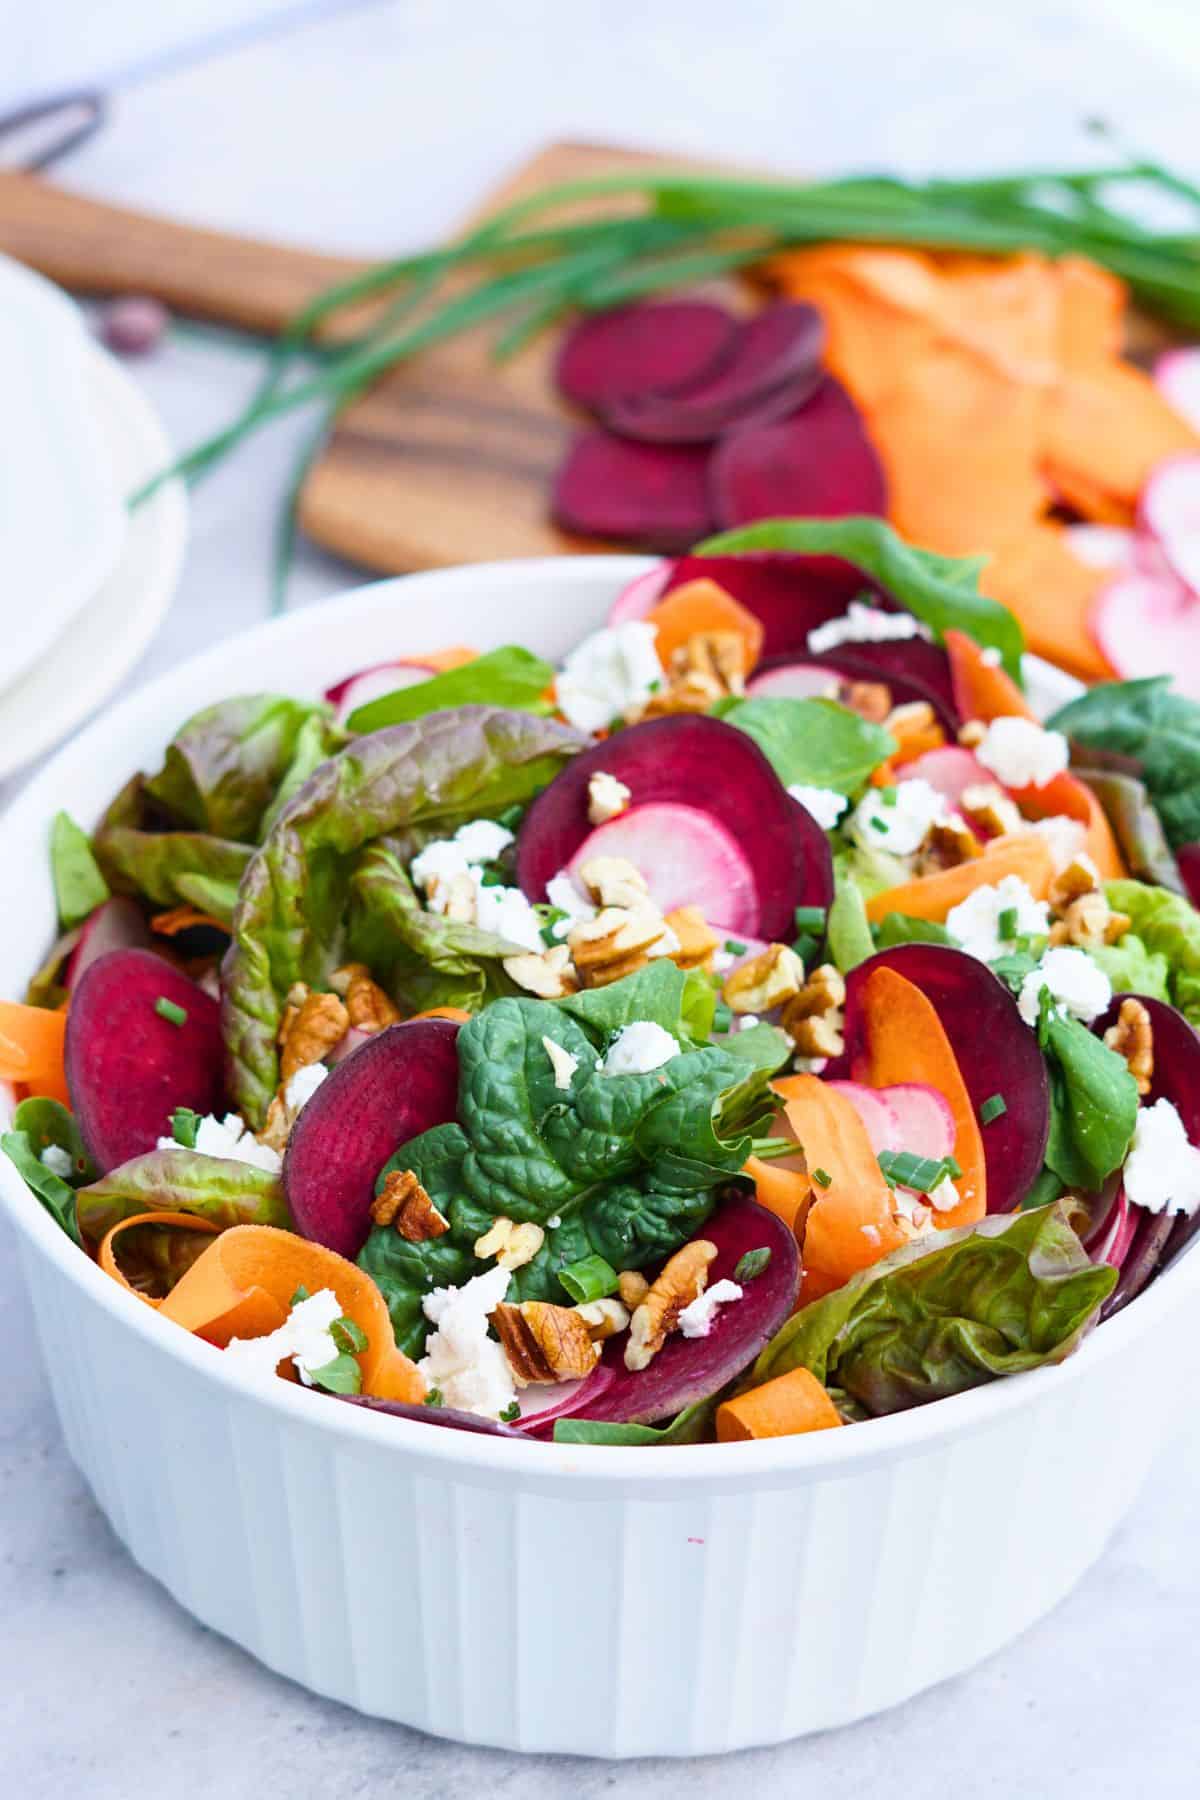
- Simple Spring Salad with Lemon Herb Vinaigrette


Thanks for reading! I hope you found this helpful and inspiring in starting your first small herb garden. Let me know in the comments which herbs you’re most excited to grow!


I’m scaling back on my flower plantings (annuals) this year, but you have inspired me to plant an herb garden instead. Thanks Sierra!!!!
Donna, thank you so much for the kind comment! You won’t regret planting herbs – they’re the gift that keeps on giving. And most will even produce blossoms just like annual flowers, so you get the best of both worlds!
It’s Sunday morning and I just harvested fresh chives, parsley and thyme to go with my lemon zest, garlic and white wine for the marinade for this week’s meal prep chicken thighs. Everyone is asleep and my kitchen is fragrant and calming before the week begins!
That all sounds like heaven to me!